hudebnik: (Default)
Not much specifically planned for this weekend. We took down the last of the Christmas decorations yesterday in honor of the Equinox. [personal profile] shalmestere spent much of yesterday laminating dozens of paper snowflakes for easier mounting and storage until next year, and there are more of them to go. We might go to a Piffaro concert in Philadelphia. We might attend a NAVRS on-line play-in. I should probably get a haircut. I've started a batch of sourdough bread, which should be ready by tonight. We should probably get a new name-and-phone-number tag for Archie, and start the bureaucratic process of replacing his rabies and license tags, because they've all gone missing in the past week.

I want to make some progress on our latest medieval pavilion. I reported here on things that needed to be done to it after last Pennsic, but most of that hasn't happened yet, and we're now closer to next Pennsic than to last Pennsic.

I designed it to be set up either with guy-lines alone, with a spreader hoop, or with hub-and-spoke support, but when we set it up with guy-lines alone (at Pennsic, on sloped ground and with limited room for long rope throw), the shoulders sagged asymmetrically and it both looked ugly and felt claustrophobic. I think the spreader-hoop approach will be easier and quicker to implement than hub-and-spoke, and to that end I mail-ordered some flexible aluminum tent-poles a few days ago (their medieval persona is a willow withy), so all I need to do is sew a sleeve for them to run through. Problem is, there are currently wall-hanging loops where the sleeve needs to be. But the wall-hanging loops need adjusting anyway: each end of the tent has 33 of them, while the walls each have 34 corresponding toggles, so things didn't really match up well last Pennsic. So the plan is to take most of the existing loops off the roof edge, sew on a spreader-hoop sleeve (covering a currently raw-edged seam), and reattach the loops slightly closer together on the inside face of the sleeve. Then we can feed the aluminum poles through the sleeve, and theoretically between their natural desire to be straight and the tent's semicircular shape, we'll get a nice, neat, taut, semicircular shoulder.

We may also need a rope or a rod or something connecting the two ends of the semicircle to keep them the right distance apart (i.e. to keep the poles' desire to be straight from outright winning the contest and turning an oval tent into a rectangular tent). A rod would serve double duty by hanging divider curtains and stuff like that, which we would very much like, so we'll probably need some uprights to hold that up so it can hold (a little) weight. Also need to apply waterproofing to the roof (and ideally walls), and finish waterproofing the wooden floor tiles we mail-ordered after last Pennsic, and perhaps attach another row of webbing stake-loops a foot or so up the walls to accommodate setup on sloped ground, and perhaps attach some short rope stake-loops to the webbing stake-loops on the walls. And it would be nice to have center poles that (a) look more medieval, and/or (b) provide support for the middles of the curtain-rods, or even a hub-and-spoke construction. But that's a larger woodworking project.

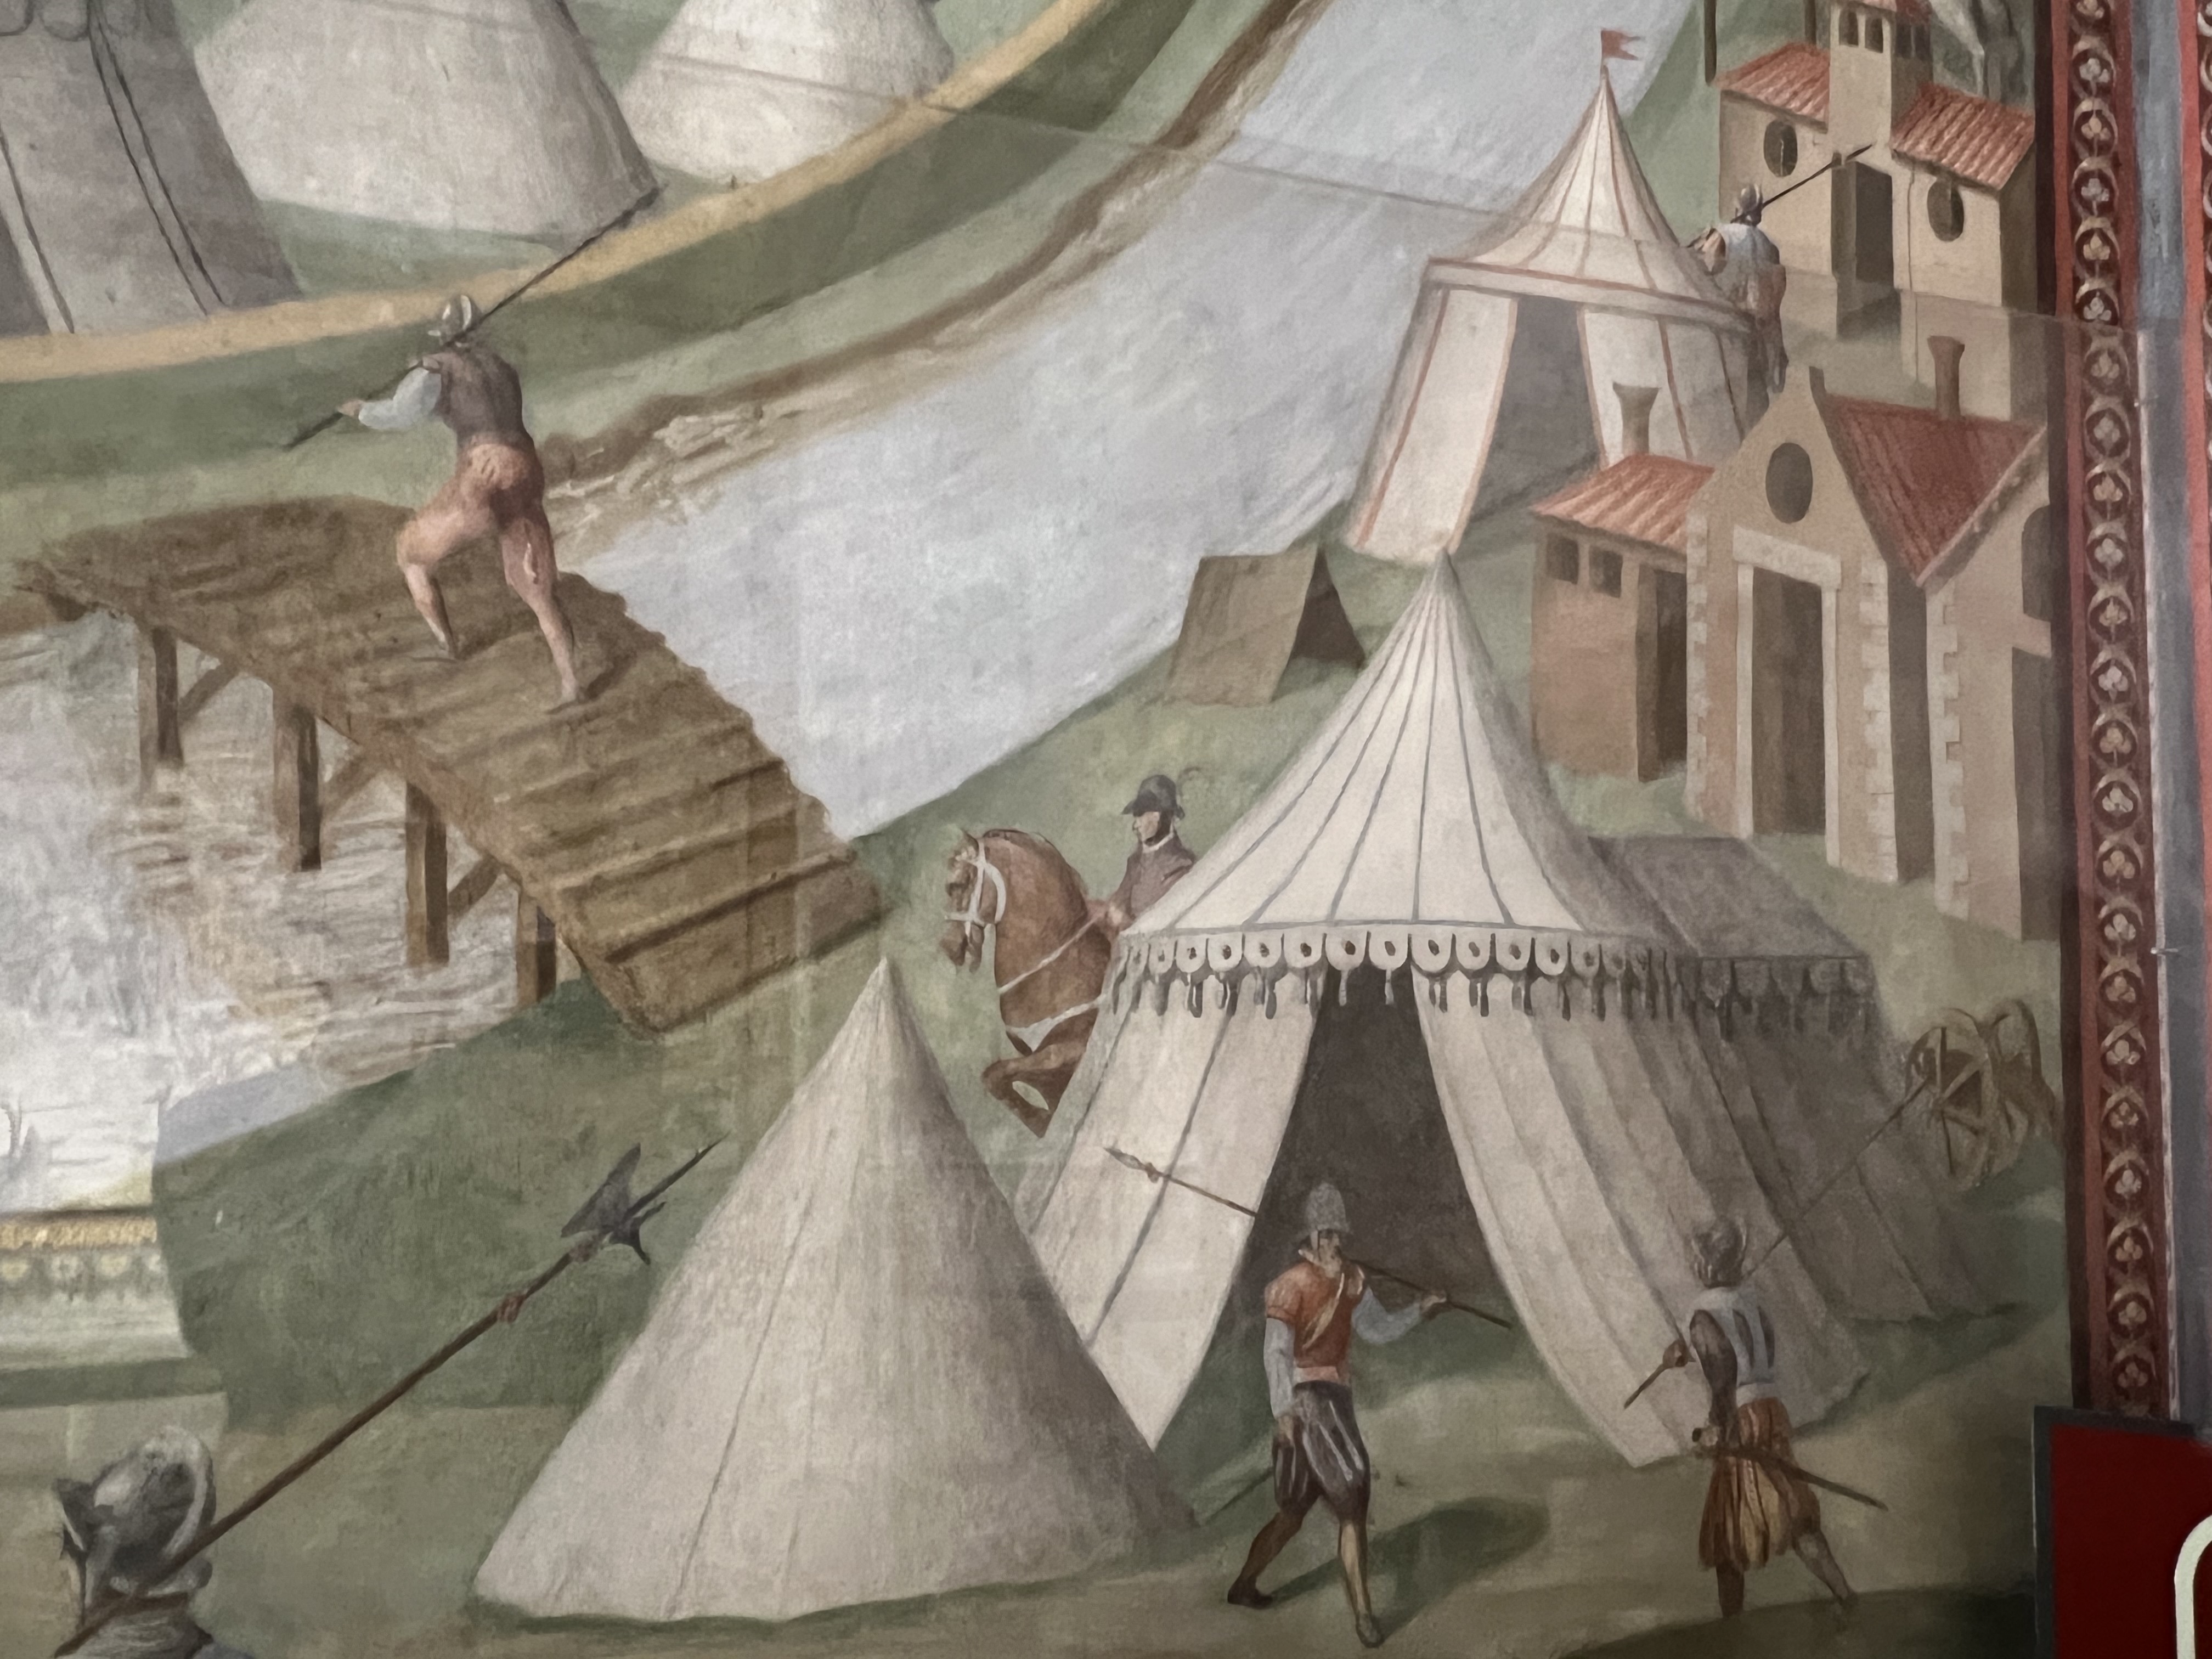
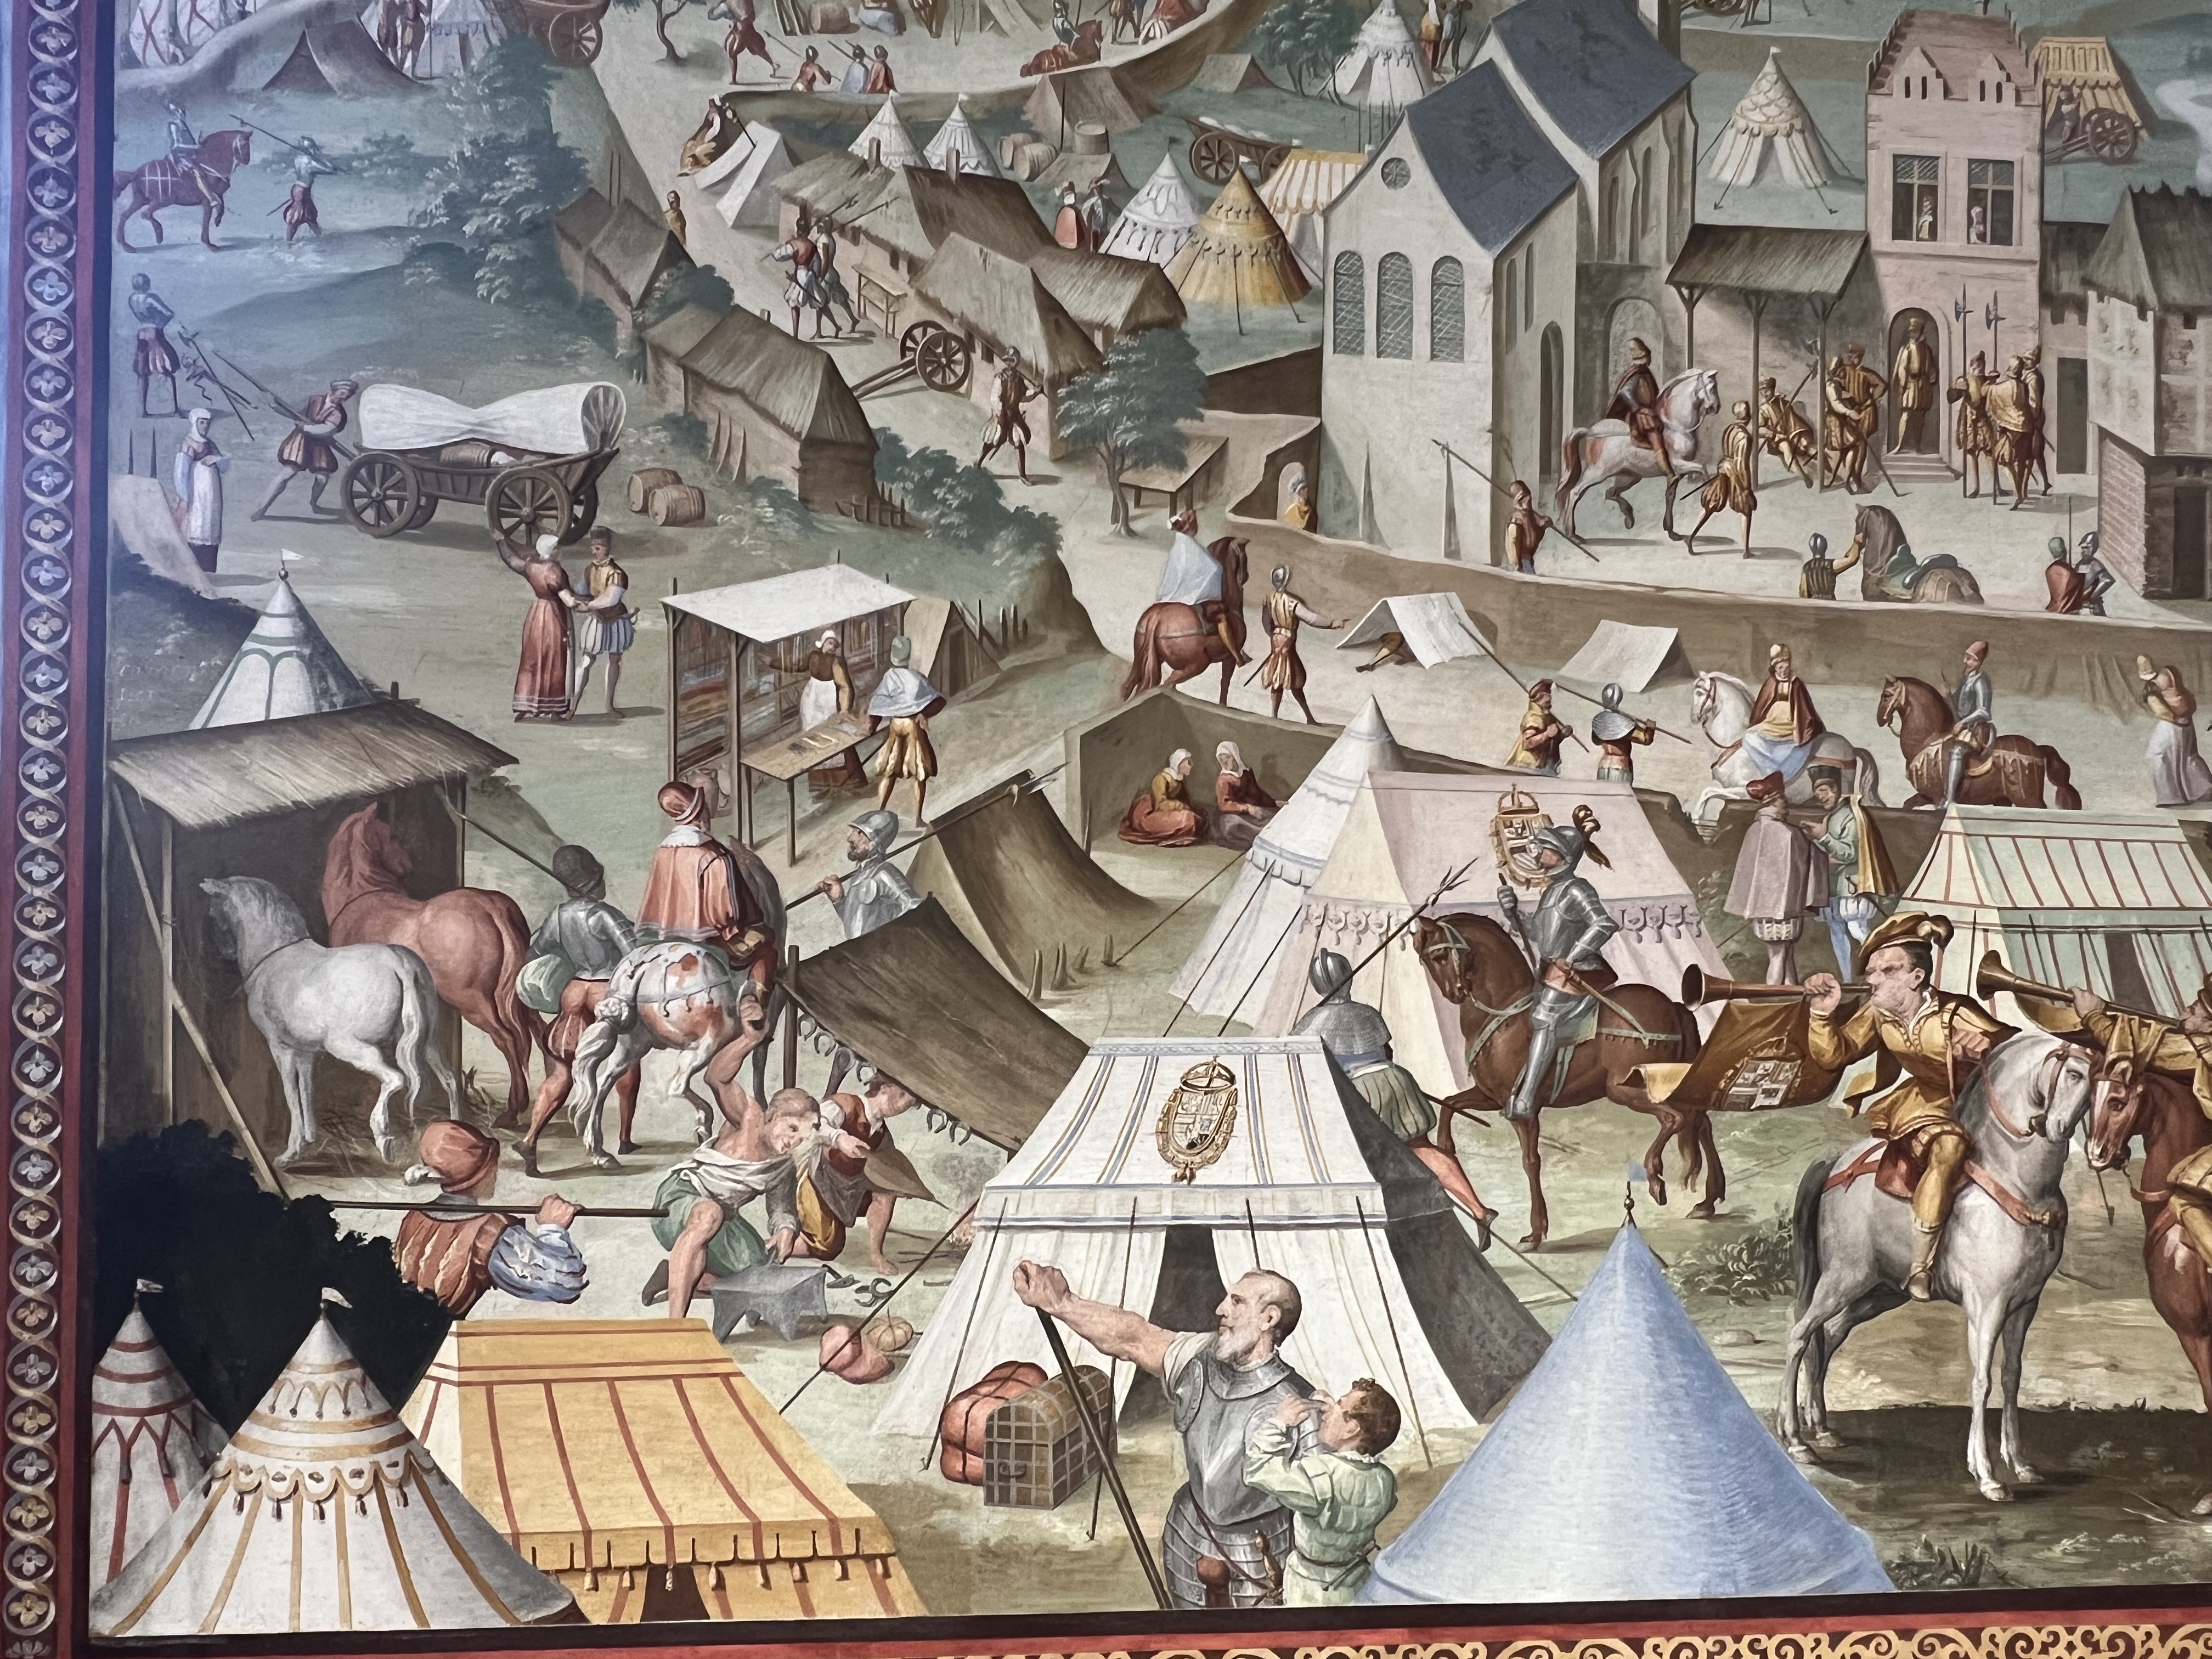
It would also be nice to apply some painted decoration to the roof and/or walls, and that should probably be done before we waterproof it, but if we wait for the paint project to happen, the waterproofing will never happen and we'll have a lot of wet, mildewy stuff. OTOH, many of the medieval pictures of tents show elaborate decoration on the valence and/or roof cap, and much less on the walls or the main part of the roof, so it would be plausible to do a smaller decoration project on the valence and leave the walls and roof (which are more critical to waterproof) fairly plain. OTTH, other medieval pictures of tents have elaborate decorations covering the walls and roof as well as the valence and roof-cap. This will need more discussion and consideration.

Tents

Jun. 19th, 2024 02:06 pm
hudebnik: (Default)
Another episode in the saga of building Tent #5 (see this post and that post). I've attaching loops to the edge of the roof from which to hang the walls. The triangular roof panels are roughly 26" at the widest point, so I figured I would space loops every 6-1/2", four per panel, and would just wing it on the rectangular front-and-back roof panels. So I started at the right-hand seam of the tent front and started attaching loops every 6-1/2". To my great surprise, when I got halfway around, to the left-hand seam of the tent back, the next loop fell exactly on the seam, where I would have chosen to put it anyway. To my even greater surprise, when I got the rest of the way around, the measurement from the last loop I attached to the first one was almost exactly 6-1/2". The odds of that happening are comparable to those of drawing a Royal Fizzbim in your first game. It perhaps indicates the existence of a benevolent God who wants me to finish this tent before I die.

Next up: attaching to the tops of the walls a bunch of toggle-and-loop assemblies that are supposed to hang from the 96 loops I just attached to the roof edge. And making sure I've got webbing stake loops sewn to the wall bottom all the way around. And then making guy-ropes. And the stakes won't actually go through the sewn-in webbing stake-loops; there will be short twine loops between the two, so I have to make those. And a ridge-pole -- I'm thinking clear pine 2"x3" or 2"x4", a little over 6' long. And there's the matter of center-poles: I think it's too late to try to build new ones by this Pennsic, so I'll probably just get some longer pipes to connect the wheelbarrow-handles that we've been using as center poles for 28 years now.
hudebnik: (Default)
Thursday afternoon, as I walked home from the train station, I saw a black cat in "fierce hunter" mode in the front yard of a house, sneaking up on a cherry tree. The cherry tree was covered with netting (presumably to keep the birds and squirrels off the cherries -- at least that's why I put netting over our cherry tree), and the netting was moving in fits and starts. There was a mockingbird inside the netting, trying vainly to escape, and as I watched, the cat crept up close to the trunk and made a vertical leap. Missed the mockingbird, and got briefly snagged in the netting itself, but seemed determined to try again. So I put down my pack, walked up onto the lawn, and moved enough of the netting that the mockingbird could find its way out. Bird and cat are no longer caught in the netting. My work here is done....

Last night I made some small progress on pavilion construction: I attached webbing stake loops near the bottoms of the seams in one wall piece. I was going to do the same to the other wall piece, but ran out of webbing, so [personal profile] shalmestere ordered more from Amazon, to arrive Monday. In the mean time, I guess I can work on the toggle-and-loop assemblies that attach the tops of the walls to the bottom edge of the roof, since those involve a different kind of webbing that I haven't run out of yet. I'll still need to make guy ropes, and short rope loops to attach the webbing stake loops to the stakes, and a ridge pole, and make sure we have something that will work as center poles (probably re-using our existing wheelbarrow-handle center poles, with different-length steel pipes to connect them together). It might be finished by summer camping season....

Meanwhile, I have paid-employment work to do today, even though it's Saturday: there's a batch job that runs the 1st and 15th of every month, with the run on the 15th usually uninteresting, so the only chances to test whether my code responds to it correctly in realistic conditions are once a month on the 1st. This is obviously not an efficient test-and-debug cycle, so I'm also working on ways to test independently of the batch job, but that framework isn't up and running yet.

And I'm underslept: I went to bed at midnight, [personal profile] shalmestere came to bed something like 45 minutes later, and one of the dogs woke me up at 5:00 AM, I still don't know why.

Travelogue

Mar. 22nd, 2024 08:02 pm
hudebnik: (Default)
Got up not quite as early as yesterday and took the subway to the bus to the town of El Escorial, which surrounds the Royal Monastery of St. Lawrence at El Escorial. See, in 1557 King Philip II won a major military victory on St. Lawrence's Day, and in celebration, he spent twenty years and mind-boggling amounts of money building a combination monastery, basilica, school, library, and Royal palace.


It's not the warm, cuddly sort of royal palace; indeed, it makes most royal palaces look warm and cuddly by comparison, and the guidebooks describe it as resembling a penitentiary from the outside.


And even from the inside.


The library, which connects the monastery side of the building with the school side, is somewhat friendlier.


It boasts a number of 1000+-year-old Arabic, Latin, and Greek texts, and at least four volumes of Alfonso X El Sabio (two versions of the Cantigas de Santa Maria, a book on astronomy, and one on the properties of stones).

We squeed over the Cantigas ms out on display in a glass case, then realized it was a facsimile (the same facsimile edition D. had access to when she interned at the Lily Library as a student).


But the real one is probably somewhere in that room, or at least that building.

The Basilica is decorated by top-notch 16th-century artists, such as Titian and Cellini, but again it's designed to be coldly perfect and impressive rather than welcoming.

The school side of the building, I think, still functions as a school and isn't open to the public, while the monastery side appears to serve only as art gallery and office space. It's crammed full of Titians, El Grecos, Tintorettos, Bosch-followers, and lesser lights. Mostly very well done, but this idiom really doesn't do anything for me.... Behind the Basilica are the royal residences, which Philip and his long line of descendants made liveable... and decorated with oil paintings, frescoes, tapestries (with cartoons by Goya), etc. including a lot of paintings of battles. I picked out some that had good pictures of tents.


Some of the walkways inside the complex look like Nine Men's Morris boards:


And the whole place is surrounded by starkly-beautiful mountains:


Had lunch across the street from the Monasterio, then caught a bus back to Madrid. It was only about 4 PM, but we were too fried to go back to the archaeological museum. Next trip, I guess.

tent stuff

Mar. 3rd, 2024 09:29 pm
hudebnik: (Default)
So a week ago I cut out 8 trapezoids for tent walls, and then the work week happened, so no progress for a couple of days. Yesterday I attached one of them to a door panel, and today I attached three more. Four to go, then the other door panel, and the walls are grossly complete.

I say "grossly" because they'll still need lots of little stuff: stake loops at the bottom, toggle loops at the top and ends, maybe hemming... it would be really nice to not have to hem 62 feet of wall-bottom and 52 feet of wall-top, and they are selvages, so it's not absolutely necessary, but if they'd been woven on medieval looms (presumably less than 7' wide), the top and bottom would be cut along the weft. I think that can be postponed: if we need to set up the tent at Pennsic without that hemming, it'll still work.
hudebnik: (Default)
[personal profile] shalmestere started building a 10' round medieval pavilion (henceforth #1) before she met me, I got interested in the design challenge, and we finished it together in 1994. After an especially rainy Pennsic with the two of us and our musical instruments sharing a 10'-diameter tent, we decided it wasn't nearly big enough, and started building a 12'x17' oval tent (#2), which we finished in 1996. Pictures of both here.

That served us for many years: we've replaced many of the ropes, and replaced the valence once or twice, but the roof and walls have pretty much survived. But they've gotten thinner, and less water-resistant, and more faded, and around 2013 she suggested we build a new one — another two-pole oval tent, slightly larger than #2. So I started designing, and bought the fabric (50 yards of 84" Sunforger canvas) in April 2014. But it was never a top priority, so I made only minimal progress every year, and it dragged on.

In 2015, Will McLean died and left us his beautiful round arming pavilion (#3). It's about the size of our #1, but better-made (largely by Mac & Marianne); not big enough for the two of us to camp in with instruments, but it works nicely for daytime living history shows.

In 2022, [personal profile] shalmestere put her foot down and said she wouldn't go to another event in Tent #2 (which by this point was 26 years old). I reopened the design docs and started working on our new pavilion again, while she mail-ordered a 5m-diameter round tent from India (#4). So far we've used the mail-order tent at two events in 2023; it requires ten vertical perimeter poles, which I object to on historical-authenticity grounds, but they do allow you to take up less real estate than a tent with no shoulder structure at all. And if you're setting it up on sloped ground, you have to compensate by using perimeter poles of different lengths, which is a pain. But it seems to be well-made, and better than no pavilion at all.

Anyway, I'm very much hoping to finish tent #5, the one we started designing in 2013, by this Pennsic. The roof was finished in September 2023, and I turned my attention to walls, which are simpler. There will be two wall pieces, overlapping at front-center and back-center so we have a front and back door. Each wall consists of two rectangular door pieces and eight trapezoids to go around the semicircular ends of the tent. So I've been cutting trapezoids. More precisely, I've been cutting rectangles from the bolt, pre-washing the rectangles, and then (after they've shrunk as much as they're likely to) cutting two trapezoids from each rectangle.


Selvages are top and bottom edges of this diagram. The trapezoids are supposed to be 27.5" at the narrow end and 34.5" at the wide end, a difference of 7", so an isosceles trapezoid should be 3.5" off the perpendicular on each side.

But where is the perpendicular? When you pre-wash fabric like this, the cut edges come out somewhat raveled. So in order to make sure I was cutting proper isosceles trapezoids, I spent at least an hour finding weft threads that started or stopped part way across the fabric, and pulling them the rest of the way out, until I had a single weft thread forming the edge all the way from selvage to selvage; then I could use the corner between that weft thread and the selvage as a consistent starting point for the measurements in the diagram.

And it didn't work. Every measurement was right, but the trapezoids were decidedly non-isosceles. Whether I folded vertically down the middle so the selvage matched itself, or crosswise, one selvage to the other, one bias edge always stuck out several inches farther than the other. (We're talking 2-3" off, over a fabric width of about 80" after shrinkage, so that's maybe a 2° angle.)

This happened for at least half a dozen trapezoids. I rechecked the arithmetic, measured everything three times, and it kept happening. The only explanation I've been able to come up with is that the weft threads are consistently not perpendicular to the selvage.

So my revised cutting method is "fold the cut edge toward the center of the fabric so both selvages match themselves, even if that means one end is folded several inches farther than the other; use this perpendicular fold as a measuring reference." Which has the advantage that I don't have to spend half an hour pulling out weft threads, and the resulting pieces look isosceles. But I worry that they may stretch weirdly because one bias edge is farther off-grain than the other.

Have any of my sewing-and-costume colleagues run into this problem?

Da Weekend

Nov. 4th, 2023 01:56 pm
hudebnik: (Default)
We have no commitments for the weekend, so we're Getting Things Done. [personal profile] shalmestere has her own list, largely either laundry or dollhouse-furniture, but here's mine.

  • Haircut ✓

  • Bake bread ✓

  • Clear space in basement for trunk freezer (we just had an electrician put in a line to support it, but there's a bookcase full of stuff where the hypothetical freezer needs to go) ✓/2

  • Mow lawn & sublawn ✓

  • Pay bills, file paperwork for car-insurance claim

  • Put away clothes piled in spare bedroom

  • Make tent walls -- won't get finished this weekend, but "substantial progress" ✓/2

  • Walk dogs in park ✓


Progress has been slow so far: I think my vaccinations yesterday (COVID and flu) left me getting tired more quickly than usual. But I've washed, damp-dried, ironed, and measured a couple of pieces of tent canvas, and am about to cut them into trapezoids. This requires a large area of unobstructed floor, which means the kitchen, which means I had to vacuum the kitchen floor first. Marking straight lines c. 7 feet long on fabric presents some challenges: I think the most reliable way is to use the chalk-line we bought years ago for laying floor tile. The chalk-line tends to shed a lot of chalk as it's pulled out, so (not wanting spurious chalk lines on the fabric) I pulled it out over the sink, so now the sink is full of blue tailor's chalk.

Da Weekend

Oct. 1st, 2023 07:09 am
hudebnik: (Default)
When it stopped raining yesterday, we went outside and planted some bulbs. And I edged the front edge of the yard with decorative bricks. And replaced the low fencing around the front sublawn. There are more bulbs to be planted, and there are still some gaps left behind by the front-walk construction, so I think we need to buy a couple of bags of topsoil, and probably some mulch -- I hope we can find some that aren't water-saturated, after the past few days of rain. And I need to bake bread today.

[UPDATE: we planted most of the bulbs yesterday, and bought mulch, and topsoil, and potting soil, and sand (which I used to fill gaps between the brick edging and the sidewalk). The rest of the sand may be used for annealing ferrous-metal clinch nails, or something like that. Baked a loaf of sourdough bread. Picked raspberries, and turned them into a mixed-berry smoothie with yogurt and tofu.]

I want to attach about a hundred loops to the shoulder of the tent roof, and toggles to the top of the walls, to hang the walls from the loops. Ideally, the toggles and loops would be equally spaced (in the 6"-9" range) around the perimeter, so the walls can be attached equally well wherever you start. I'm not sure that'll work, since the tent is oval rather than circular, but even if it were circular, there's another problem: how do you measure the length of a tent edge, and the distance from one toggle to the next, with sufficient accuracy that the latter divides an integer number of times into the former, with no remainder? I can measure them both in such a way that the quotient is whatever I want, and it'll come out pretty close, but the remainder is much more sensitive to measurement error. On the divisor side, the Law of Large Numbers works in my favor: if each one has an error bar of 5%, their mean has an error bar a factor of sqrt(n) (i.e. about ten times) smaller, or 0.5%, so the quotient is fairly predictable. But if the dividend has even a 1% error bar (which is quite optimistic -- it's almost 50 feet of length, measured on a heavy mound of fabric that can't be laid flat), the remainder can be literally anything from zero to the distance between toggles.

Perhaps the answer is to set up several checkpoints along the way, dividing the perimeter a priori into halves or quarters, and reset at each checkpoint. This way each quotient is only about 25 rather than about 100, so I can have as much as a 4% error bar in the dividend before having no control whatsoever over the remainder. And if one of them comes out horribly off, I can fudge that checkpoint a posteriori and try to correct it gradually between that checkpoint and the next.

About Sept. 14 or 15, I noticed a scratchy throat. On the 16th, I started coughing. It's over two weeks later now, and I'm still coughing. Two different kinds of COVID tests both reported negative, and it doesn't feel like flu (no fever, no general body aches, little or no nausea, no "my hair hurts"), but it's lasting longer than a cold usually does. Yuck. I'm due to see the doctor again on Tuesday.

pavilion

Jul. 3rd, 2023 07:00 am
hudebnik: (Default)
Spent a weird weekend at Northern Regional War Camp.

We had both taken a vacation day for Friday to pack for the event. There was yet another smoke plume from Canadian wildfires, and the air quality was getting bad in NYC, and predicted to get bad in the Hudson Valley, so we weren't sure until 10 AM on Friday that we would go at all, but I pointed out that it was an opportunity to test the brand-new pavilion that arrived mail-order from India a few days ago. So we packed things up and left Friday afternoon. Traffic was bad getting out of NYC, but clear thereafter. We reached the site (one of the numerous ugly but flat county-fair grounds the groups in the Hudson Valley tend to use for events) before dark and started setting up the pavilion.

The pavilion appears to be very well-made: solid cotton canvas, with solid machine seams everywhere, hand-sewn reinforced eyelets, steel D-rings (or I guess Delta-rings) at the shoulders to attach guy ropes, which are provided and apparently made of hemp (!). As advertised, it was shipped without poles, but it did come with steel stakes (in two lengths, presumably the longer ones for guys and the shorter ones for walls). There's no hole at the peak, but rather a reinforced pad, which means you don't need (and can't have) a spike from the center pole or a finial on the outside. We might do some surgery to change that, since the finial on the outside provides not only decoration but an attachment point for external storm guys.

First surprise: we thought it had 16 roof segments, and it actually had 10. Which makes it more difficult to lay out initial stakes before raising the roof, but not impossible.

The pavilion was intended to be set up with vertical perimeter poles: each roof seam has an eyelet near the bottom, and each wall seam an eyelet near the top, and the spike in the top of the perimeter pole goes through both to hold them up and together. However, the pavilion was shipped without any poles at all (as advertised), and we didn't want to add vertical perimeter poles for a variety of reasons (more stuff to transport, and we've never seen any evidence of them in any picture of a tent before the 16th century), so we had come up with a mechanism involving eye-bolts, washers, and S-hooks to hang the walls from the roof edge. Which basically worked, except the washers I had bought turned out to be too small, so they occasionally popped through the eyelets and the wall fell down. So that was a second surprise.

On our way to the site, we had stopped at a craft store to buy wooden ball finials to screw onto the aforementioned eye-bolts to (a) hide their obvious modernity, and (b) protect the fabric from the screw tips, so (c) I could pack up the pavilion with them in place rather than re-attaching them every time. The eye-bolts are 3/16" diameter (i.e. #10 gauge), 24 threads per inch, and the holes in the finials are 3/16" as advertised, but slightly too large to screw on: I can put them on but they won't stay unless I also use glue or wood putty or something. Third surprise.

The center pole we re-used from our oval pavilion (two hardwood wheelbarrow-handles held together by a 2' length of plumbing pipe) was too short for this pavilion (not completely a surprise -- I thought it might be the case), so the walls puddled on the ground (even where they weren't falling off the walls). And it seemed to me that if the center were any higher, and we continued not using vertical perimeter poles (so the guy ropes need to be at the same angle as the roof), the ropes supplied with the pavilion wouldn't be long enough.

With all this, the pavilion clearly wasn't habitable for the night, particularly with two hounds who might panic and run away if anything fell down, so we stayed in a motel.

Saturday morning I got up and went to the nearest hardware store for bigger washers, longer pipe, more rope, etc. I found a very nice hardware store with helpful, knowledgeable staff and almost everything on my list... except the pipe. They had the right length of pipe, but too narrow to fit over the wheelbarrow handles, and they had the right diameter of pipe, but only in 5' lengths, and they didn't have the capability to cut that kind of pipe in-house. So I tried another hardware store, and then a Lowe's, and nobody had the pipe. But at least I had better washers, and spare nuts, and more rope, and good scissors for cutting the rope, and tape for binding the ends of the rope. So I replaced the washers, and the roof is no longer falling down. I replaced one rope, as a test of feasibility, and concluded that we could do it, but (a) the manila rope is really nasty, unlike the lovely apparently-hemp rope that came with the pavilion, and (b) even with longer ropes and a longer center pole, the pavilion will take up too much real estate to be usable at Pennsic.

Which leaves us with three choices for Pennsic: (a) use our old oval pavilion, which is over twenty years old and showing its age; (b) use this one with vertical perimeter poles, which we would have to make; or (c) finish the new oval pavilion.

I have today off from work, so I plan to spend a good deal of it on option (c).
hudebnik: (Default)
For this oval tent, the roof consists of a "cap" (about 18" high) which is a rectangle plus a wide pie-slice at each end, and a "skirt" (16 trapezoids and two rectangles, sewn together into something like a belt, if your belt were 75" wide and conical, and had a circumference of over 200"). In fact, on a suggestion from Robert McPherson, I made two theoretically-identical caps, so there's double thickness at the top of the tent where the most tension is. So I needed to sew together the bottoms of both caps and the top of the skirt, with a sufficiently strong (i.e. flat-felled and top-stitched) seam.


I think that'll be the single most difficult seam in the whole tent, and it's done. Still need to add to the roof a valence and whatever mechanism we're using to hang the walls, and still need to put the walls together. And there will be lots of eyelets or grommets or webbing loops or something. (The webbing loops might be the easiest, but they also feel the most obviously modern.) And lots of ropes and stakes.
hudebnik: (Default)
Discussed tent purchase and manufacture w/[personal profile] shalmestere last night. A manufacturer in India will sell us the canvas part of a tent for about $600, but we have to provide poles, stakes, and ropes ourselves (because they're so expensive to ship). A manufacturer in the US will provide everything for $2800. Or, of course, we could finish building the one we started years ago. We could afford the $2800, but the result would look just like every other tent from that manufacturer, and we could spend the same money on musical instruments, and it would be interesting and educational to build it ourselves. Tentatively decided to try to finish our own before next Pennsic.

So I found the roof-caps (two, complete) and roof-skirt (mostly complete) and took some measurements. One half of the roof-skirt measures 103" one seam allowance in from the top edge, the other half 108". One roof-cap measures 101" a seam allowance in from the bottom edge and folded in half, the other roof-cap 104". Or something like that. But the longer half of the roof-skirt includes an 83" single-piece center panel, while the shorter half includes an 80" center panel made from two rectangles of fabric sewn together in the center, so if I insert a false seam in the middle of the single-piece center panel, it'll add strength and symmetry as well as bringing the two halves closer to the same length. I ripped out the seam at one end of the single-piece center panel (this seam had been sewn with the bottom ends matched, rather than the top ends matched as in all the other seams), and the seam at its other end was already only pinned rather than sewn. Didn't actually sew anything last night, but I know what the next three seams should be. Then there's the problem of the two not-quite-matching roof caps. Ideally, their peak-to-peak measurements would both correspond to the width of the center panels on the skirt. Do I take in a seam on the longer one, or try to extend the shorter one, or just use a bigger seam allowance on the longer one (and ignore that the peak-to-peak measurements don't quite match one another)?

stuff

Apr. 6th, 2020 07:42 am
hudebnik: (Default)
A miscellany of Things Happening, Things Not Happening, Things Getting Done, and Things Not Getting Done:

The cherry tree we planted in the front sublawn last fall has had green-tipped buds for a couple of weeks, but as of yesterday they looked as though they could eventually be leaves.

The quince trees we planted probably ten years ago in the front lawn came into leaf three or four weeks ago. I hung up a sticky trap, baited with allegedly Oriental-fruit-moth sex pheromones, about two weeks ago, and it has a bunch of black dots in it that look more like fruit flies than full-grown fruit moths, but I'll take what I can get. I have a bunch of tabs of eggs of OFM-parasitizing wasps in the fridge, and will hang up one of those as soon as I'm convinced we're getting OFM's in the sticky trap.

A couple of weeks ago we mail-ordered and installed a handheld bidet attachment to the toilet, to reduce demand for toilet paper. It was sort of a pain, because the toilet that came with the bathroom renovation a few years ago tries to hide all the hardware out of sight, so I had to attach everything without seeing it, reaching around into the narrow space between the toilet and the wall. But eventually I got things to work without leaking all over the floor. I imagine the effect could be "invigorating" in the dead of winter when the tap water is really cold. OTOH, I imagine it could be quite pleasant in the hot-and-sticky summer. And it does seem to be reducing our demand for toilet paper.

The first harp we bought, a Hobrough, is now a wall-hanger: it hasn't held tension in years. Our large Lewandowski Gothic harp is currently in a faculty office at Fordham University, to which I had lent it for this semester's Collegium Musicum before all that stuff was cancelled, and I haven't had a chance to get to Fordham to retrieve it since the Pestilence started. Our Lewandowski Romanesque harp is in good condition but has only 13 strings, which limits what you can play on it. Our Morillo Gothic harp is a little larger but several of its wooden tuning pegs have died over the years, so I've been whittling replacements for them. The last time I tried that, the smallest drill bit that fit in my Craftsman power drill was arguably too big, and the power drill is definitely too heavy and unwieldy for this kind of delicate work. We had a bunch of teeny tiny drill bits (#61-80, I think -- no idea when or why we acquired them), but they don't fit in the power drill, nor even in the Dremel. So last year I bought a set of different-sized Dremel collets (the doohickey into which bits have to fit), then discovered that my old Dremel no longer held a charge. So later last year I bought a new Dremel, then misplaced the teeny tiny drill bits. A week ago the new, mail-order teeny tiny drill bits arrived (#41-80, just to cover all the bases). (I promptly found the previous package of tiny drill bits, but most of the previous package had been lost or broken so it's OK.) Over the weekend, I finally managed to use all these things together to drill holes in some newly-whittled harp tuning pegs. I've been using maple, on the theory that it would be hard enough to withstand string tension, but they've been compressing significantly where the string goes around them, which hasn't happened to the pegs that came with the harp; I have no idea what kind of wood Morillo used, but does anybody know what kind of wood would be sturdy against both lateral (cross-grain) tension and compression? I should add some pictures.

Our third medieval-style pavilion is still a bunch of piles of fabric. Two roof-caps have been sewn together (Mac had suggested that this part is under the most stress, and so should probably be doubled), but one is an inch longer from peak to peak than the other, so I need to remedy that before putting them together or attaching them to the rest of the roof. Then we need to attach a valence on the outside of the shoulder, and probably a buttonhole strip on the inside of the shoulder, and we need to make walls, and we need center poles and a ridge pole, which I was thinking of commissioning from Mac (on the model of the lovely jointed center pole he made for Will McLean's pavilion).

Started a batch of bread dough yesterday, using the starter I got from [personal profile] ilaine last fall. With both of us at home all day, we're using more bread than usual so I've been baking a loaf every four or five days rather than every week or two. Haven't had to worry about yeast, since the starter has been working well without commercial assistance, but flour has been scarce every time I've been to the grocery in the past few weeks. Pictures to follow.

Last night I dismantled an old fitted sheet that Thibaut (upon whom be the peace and the blessing) had put holes in, and finally made a couple of masks, using this pattern from the Washington Post. After making the first one, I understood the pattern instructions better, so the second one is neater (and has fewer cutting errors, and fits [personal profile] shalmestere's smaller face pretty well). The first one basically works for me, but I may go back and make another one for myself now that I understand the pattern better. The directions call for four strips of "elastic ribbon", without specifying their length: I thought "If I'm using elastic anyway, why don't I just use two so I don't have to worry about tying them?" So I did that. It turns out I needed about 14" of elastic for the top band; 14" for the bottom band was too long on both of us, so I did 12" for the bottom band of [personal profile] shalmestere's mask and that seems to work. It's important that the elastic be pointing in (with the cut end almost at the edge of the fabric) when you sew it on. Pictures to follow.

We got a couple of used wooden shutters mail-order last week. Haven't attached them to the office windows yet, because the widths aren't exactly right and it'll take some customizing to get them to fit, but they're propped up in the windows now and they look cute. Pictures to follow.

Saturday we attended an early-notation class, led by Pat and Doug in Durham, with people joining from the San Francisco Bay Area, the DC area, Louisiana, British Columbia, etc. I don't think any of the Hawaii early-music posse were there. The notation itself wasn't difficult -- Petrucci, early 16th century, and very visually clear -- but the rhythm was sometimes tricky, and they picked some lovely pieces. On Zoom, there's enough propagation delay that people can't "play along" and hear one another in real time, so Pat and Doug picked a bunch of three-part pieces of which they played two parts so students could play the third and hear all three. [personal profile] shalmestere and I, however, were across the dining room table from one another, so we usually played two different parts, so one or the other of us was usually doubling Pat or Doug.

Today is Monday, which means I should actually get clean and dressed and "go to work" (either in the home office, on the living room sofa, or at the dining room table).

Profile

hudebnik: (Default)
hudebnik

June 2025

S M T W T F S
1234567
891011121314
15161718192021
22232425262728
2930     

Syndicate

RSS Atom

Most Popular Tags

Style Credit

Expand Cut Tags

No cut tags
Page generated Jun. 16th, 2025 06:57 pm
Powered by Dreamwidth Studios