Entry tags:
Casting, continued
Following on this post...
Finished making a three-part silicone mold of the button. I hadn't applied enough release compound (aka Vaseline) to each mold piece before pouring the next one, so it took some work to get them apart, and they tore a bit, but I did get them apart, extricated the master button, added a sprue and an air vent (coming off the back loop, to ensure that pewter gets into the back loop) by hand, and melted and poured some pewter. The first pour didn't even get from the sprue into the button, so I enlarged the sprue and the air vent, re-melted it, and poured again. This time the button is mostly complete, even the loop on the back. There's a glitch on the front center of the button,
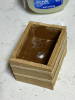
I built a 2"x2"x3" mold box of MDF, glued together three of the five sides, rubber-banded on the other two sides, filled the bottom with non-drying plasticine modeling clay, and embedded the button in the clay. Poked holes in the clay with a pencil to serve as registration points. Brushed everything lightly with Vaseline.
Mixed up 100g of molding compound and poured it on top.

24 hours later, the compound was cured. I took off the rubber bands and the two un-glued box panels.

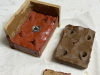
Separated the clay from the silicone and put the latter back in the box, facing up. The pencil holes in the clay have become cones in the silicone.
Put the box back together to pour silicone for the back of the button.

At this point I realized that if I poured a single-piece back, it would go through the loop in the back of the button, and I'd be unable to remove the button master without tearing the mold. So the back would have to be two pieces. I filled half of the top with plasticine, up to the back loop, and poured silicone in the other half.
24 hours later this was cured, so I took out the plasticine...

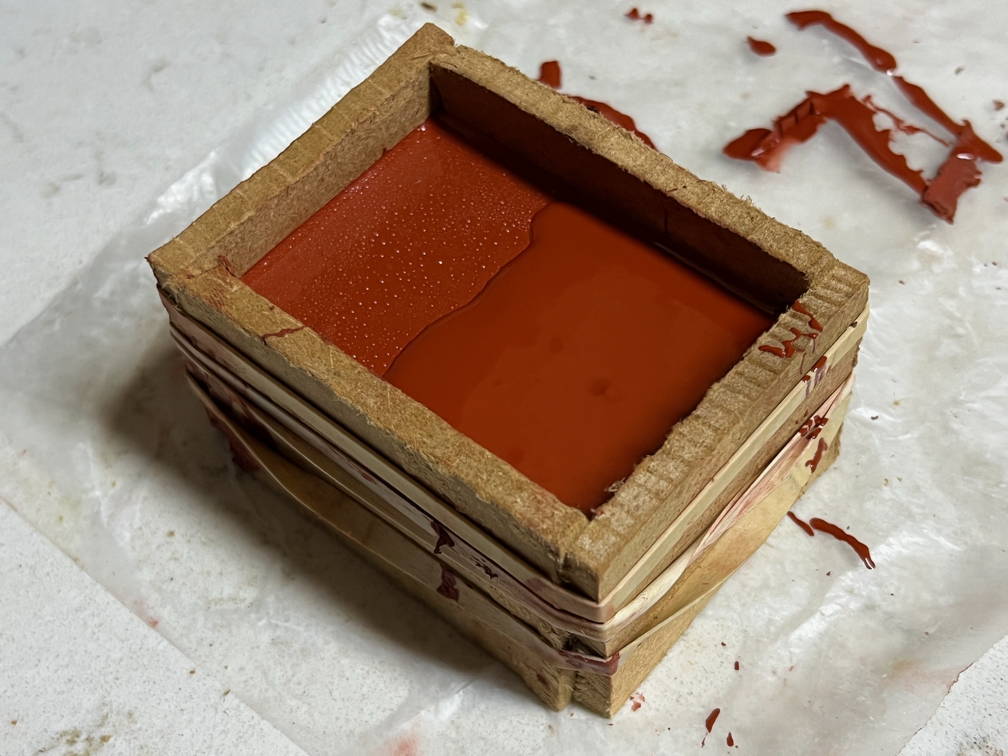
... and poured silicone for the second half of the back (the near side). The "droplets" on the top of the far side are non-fat baking spray, which I used as a release agent this time. I think the Vaseline works better, in retrospect.

24 hours later, this was cured, I opened up the box, and pried the three pieces of mold apart. This wasn't easy: I guess I hadn't applied enough release agent, or the right release agent, or something. Parts of the mold tore, including the registration cones, but enough remained of them to serve their purpose.

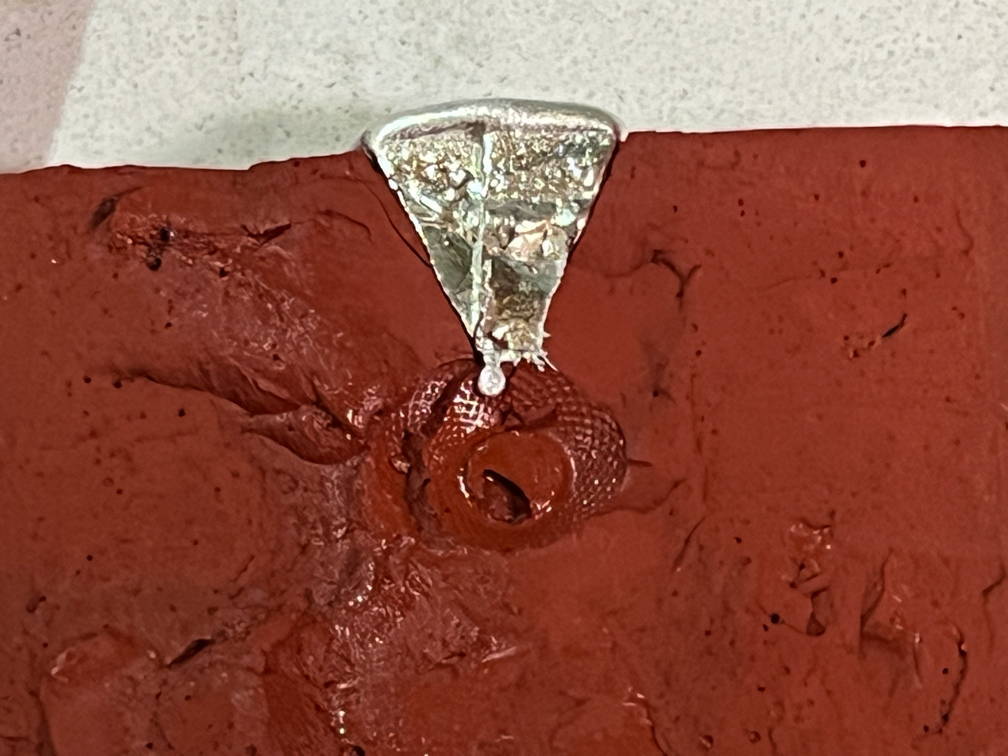
Now I needed to add two things by hand: a funnel or "sprue", to pour the pewter into, and an air vent to allow air to escape. I was concerned about pewter getting into the back loop, so I made only one air vent, coming off the back of the back loop. Used a kitchen paring knife.

Likewise, the sprue is cut with a kitchen paring knife. You can see flaws in this magnified image that I couldn't actually see at the time.

I put the mold pieces together and held them in place with a vise attached to the kitchen counter. Forgot to take a picture of this, but you'll see it later.
Time to melt some pewter! I had some one-pound ingots, but for this tiny piece I just melted down the bowl of a broken pewter spoon. Which was small enough to fit in the casting ladle directly, which is good because I couldn't find the small saucepan I had bought specifically for casting pewter. I put the ladle directly over the flame of a gas stove, with the overhead exhaust fan going full blast. (I'm sure there's still something terribly unsafe I'm doing here, but I don't know what.)

After a couple of minutes with no visible change, things started melting in a few seconds.

There was some slag on the top, but when I tilted the ladle, the clean pewter poured to the side and the slag stayed behind. Poured pewter into the mold.
After about five minutes, I opened up the mold and found that the pewter hadn't even reached the body of the button.

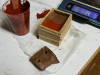
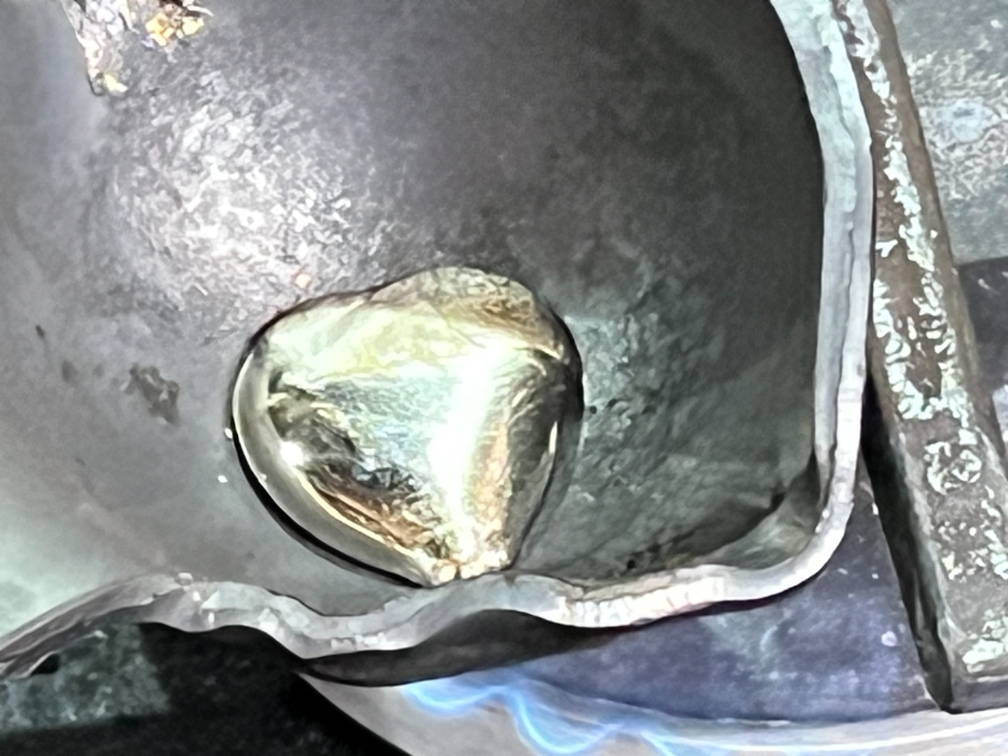
So I got out the paring knife and expanded the sprue and the air vent a little, re-melted the pewter sprue

into a lovely silvery blob

and poured it back into the mold.
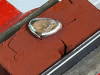
After five minutes, I opened it up. Much better: the button is mostly complete, even the back loop.

Here's the same thing in close-up. The needle sticking up from the back loop is the pewter that tried to escape through the air vent. Easily broken off and re-melted.

I'm reasonably happy with the back, but there's still a glitch or two in the front. I think there was an air bubble in the silicone, so there's a blob of pewter in the front center where there shouldn't be. Filled the air bubble with wood glue, left it to cure overnight, and I'll see whether that works. If not, I'll put the button back into the two back pieces in the mold box and re-pour the front piece of mold.
Continued a few days later here.
Finished making a three-part silicone mold of the button. I hadn't applied enough release compound (aka Vaseline) to each mold piece before pouring the next one, so it took some work to get them apart, and they tore a bit, but I did get them apart, extricated the master button, added a sprue and an air vent (coming off the back loop, to ensure that pewter gets into the back loop) by hand, and melted and poured some pewter. The first pour didn't even get from the sprue into the button, so I enlarged the sprue and the air vent, re-melted it, and poured again. This time the button is mostly complete, even the loop on the back. There's a glitch on the front center of the button,
I built a 2"x2"x3" mold box of MDF, glued together three of the five sides, rubber-banded on the other two sides, filled the bottom with non-drying plasticine modeling clay, and embedded the button in the clay. Poked holes in the clay with a pencil to serve as registration points. Brushed everything lightly with Vaseline.

Mixed up 100g of molding compound and poured it on top.

24 hours later, the compound was cured. I took off the rubber bands and the two un-glued box panels.

Separated the clay from the silicone and put the latter back in the box, facing up. The pencil holes in the clay have become cones in the silicone.

Put the box back together to pour silicone for the back of the button.

At this point I realized that if I poured a single-piece back, it would go through the loop in the back of the button, and I'd be unable to remove the button master without tearing the mold. So the back would have to be two pieces. I filled half of the top with plasticine, up to the back loop, and poured silicone in the other half.

24 hours later this was cured, so I took out the plasticine...

... and poured silicone for the second half of the back (the near side). The "droplets" on the top of the far side are non-fat baking spray, which I used as a release agent this time. I think the Vaseline works better, in retrospect.
24 hours later, this was cured, I opened up the box, and pried the three pieces of mold apart. This wasn't easy: I guess I hadn't applied enough release agent, or the right release agent, or something. Parts of the mold tore, including the registration cones, but enough remained of them to serve their purpose.

Now I needed to add two things by hand: a funnel or "sprue", to pour the pewter into, and an air vent to allow air to escape. I was concerned about pewter getting into the back loop, so I made only one air vent, coming off the back of the back loop. Used a kitchen paring knife.

Likewise, the sprue is cut with a kitchen paring knife. You can see flaws in this magnified image that I couldn't actually see at the time.

I put the mold pieces together and held them in place with a vise attached to the kitchen counter. Forgot to take a picture of this, but you'll see it later.
Time to melt some pewter! I had some one-pound ingots, but for this tiny piece I just melted down the bowl of a broken pewter spoon. Which was small enough to fit in the casting ladle directly, which is good because I couldn't find the small saucepan I had bought specifically for casting pewter. I put the ladle directly over the flame of a gas stove, with the overhead exhaust fan going full blast. (I'm sure there's still something terribly unsafe I'm doing here, but I don't know what.)

After a couple of minutes with no visible change, things started melting in a few seconds.

There was some slag on the top, but when I tilted the ladle, the clean pewter poured to the side and the slag stayed behind. Poured pewter into the mold.

After about five minutes, I opened up the mold and found that the pewter hadn't even reached the body of the button.
So I got out the paring knife and expanded the sprue and the air vent a little, re-melted the pewter sprue

into a lovely silvery blob
and poured it back into the mold.
After five minutes, I opened it up. Much better: the button is mostly complete, even the back loop.

Here's the same thing in close-up. The needle sticking up from the back loop is the pewter that tried to escape through the air vent. Easily broken off and re-melted.

I'm reasonably happy with the back, but there's still a glitch or two in the front. I think there was an air bubble in the silicone, so there's a blob of pewter in the front center where there shouldn't be. Filled the air bubble with wood glue, left it to cure overnight, and I'll see whether that works. If not, I'll put the button back into the two back pieces in the mold box and re-pour the front piece of mold.
Continued a few days later here.